Wednesday, February 24, 2010

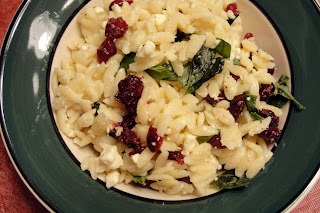
Cranberry & Feta Orzo Pasta Salad

I saw this recipe here and I knew I had to try it. I was a little nervous having cranberries in a pasta salad, but it was SO good!

Ingredients
1 lb orzo pasta
3 tablespoons olive oil
1 cup crumbled feta cheese
3/4 cup dried cranberries, chopped
10 or more fresh basil leaves, chopped
4 tablespoons lemon juice
2 teaspoons salt
1 teaspoon black pepper

*Optional: chopped grilled chicken or turkey pepperoni (perfect to make this more of a filling meal instead of a side)

Boil orzo according to the package.

Drain pasta, let cool, and pour into a large bowl.
Add olive oil and mix.

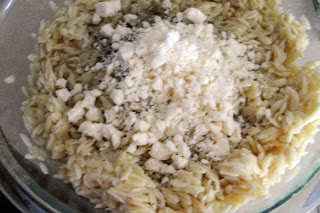
Add the remaining ingredients and mix well.

Lemon juice...

Salt & pepper...

Feta cheese...

Cranberries...

Basil...

I like my pasta salad really cold, so I suggest refrigerating for at least an hour before serving.
For a quick fix, put it in the freezer for 30 minutes.

Enjoy!
Sunday, February 21, 2010

The family room is coming together!

I can finally say that we are getting close to being done! For the last few week we've been working really hard to get things done. Now that we can look at the room and see how far it's come, it just pushes us to keep going. The room looks so warm and inviting!

So here's a few more sneak peeks...

The mantle is done and we finished grouting the tile over the weekend. I'm still planning on painting the fireplace doors silver to match the other hardware in the room.


The bookcase is painted and ready to be accessorized!
And I have my work cut out for me because this is a HUGE area to fill!

Sunday, February 14, 2010

Happy Valentine's Day!

I want to wish everyone a wonderful Valentine's Day!

Today we celebrated by going out for a yummy breakfast at Egg Harbor and working on the family room renovation.


So remember my heart banner from earlier this week?When I cut out the hearts, I saved my extra inner hearts for a small project I had planned.
I wrote little notes to my hubby explaining the things I love about him.

Then this morning, before he woke up, I hung them all over the bathroom mirror.
Surprise!
Of course, I have to brag about the beautiful pink roses he got me. Fresh flowers are a very rare thing in our house, so I was super excited!


Wishing you a wonderful day with your family and friends!

Leave me a comment and tell me how you celebrated the day...

Wednesday, February 10, 2010

Cute Valentine's Day Heart Banner

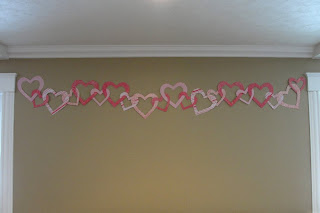
I decided our under-construction family room needed some Valentine's Day cheer. So I found this really easy heart banner here.

As I've said in the past, scrapbooking paper is a rip-off and I hate paying a lot for it...I have a SECRET way to find free paper! Check out this post for info.

Anyway, I found some cute patterns and Photoshopped them to pretty pinks and reds for Valentine's Day. I printed out 2 pieces of each of the 5 patterns. If your paper is really thin, I would suggest mounting on cardstock to make them heavier.

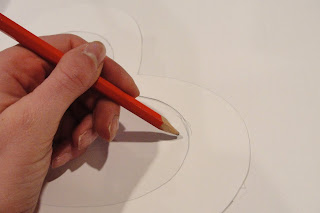
Then I cut out my heart template

I traced the hearts on the scrapbook paper

Then I cut out all my hearts
(I saved the small hearts for another small project for the hubby's gift)

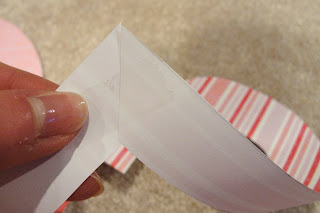
I linked the hearts together to create a long chain

Then I taped the slit on the back of each heart

Now I smile every time I walk into our messy family room and see it.


Happy Valentine's Day!

Sunday, February 7, 2010

I have a confession...


Isn't this a cool-looking pumpkin?

Well...it's still displayed in my kitchen.

It STILL has not rotted.

So I refuse to throw it out until it does.


Am I crazy?

What's your confession for today?

A trip to the mailbox brought me...labels!


So remember a couple week ago when I showed you my address labels I made?

These were some of the designs I came up with.


I was sick of waiting for those random free ones to come in the mail.

Literally within 3 days of posting that, I got FOUR sets of free labels in the mail!

Can't beat free, but couldn't they have come a little earlier? : )

Wednesday, February 3, 2010

Rest your head on this comfy neck pillow

I've wanted one of these neck pillow for years to help keep the pain away while on a long car ride. But since I'm such a bargain hunter, I refused to pay a lot for one and decided to make one for FREE at home.

Supplies:
fabric
matching thread
sewing machine
pillow filling
scissors
needle
pins

Start by printing your pattern.
I made my own template using this image and blowing it up to the size I wanted.

Download this template.

Position your paper pattern on the fabric and pin.
Trace around the pattern and cut it out. You'll need two pieces for a front and back.

Place your two piece of fabric together with wrong sides out and pin.

Sew around the entire pillow with a .25" seam allowance.
Leave a 2 inch opening so you can add stuffing later.

Turn the pillow inside out so the good side of the fabric is showing.

Fill your pillow with stuffing. The more stuffing, the more comfortable and smushy it will be. But don't use too much or your seams will start to rip!

Fold over the edges of the opening and pin closed.

I usually hand-sew these because it's easier and it's such a small area.
Machine sewing works too.

Lean back and relax!
Related Posts with Thumbnails